
How to Style a Console Table Like a Designer | Timeless Decorating Ideas
Category: Console Table Styling
Read Time: 5 minutes
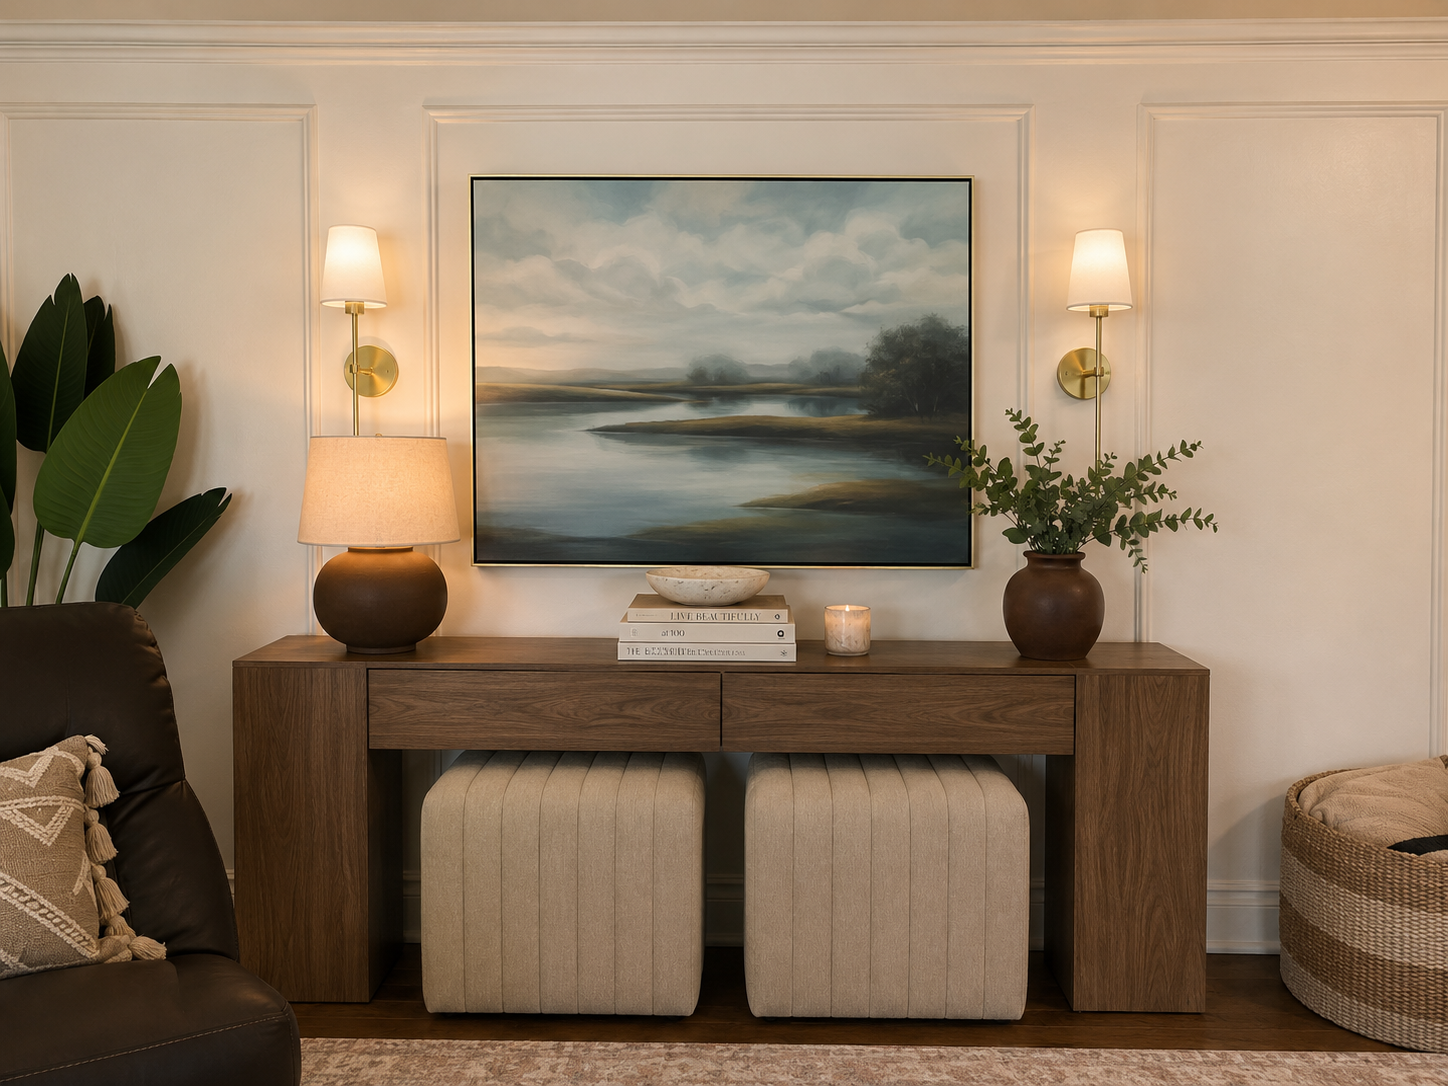
Why Console Table Styling Matters
Have you ever bought a beautiful console table only to stare at it wondering what belongs on top?
I've been there.
Styling a console isn't about buying more décor it's about knowing which pieces deserve a place and how to arrange them so the entire room feels balanced.
After styling and restyling my own living room more times than I'd like to admit, I finally landed on a formula I now use every time.
Today I'm sharing exactly how I do it.
Step 1: Start with an Anchor Piece
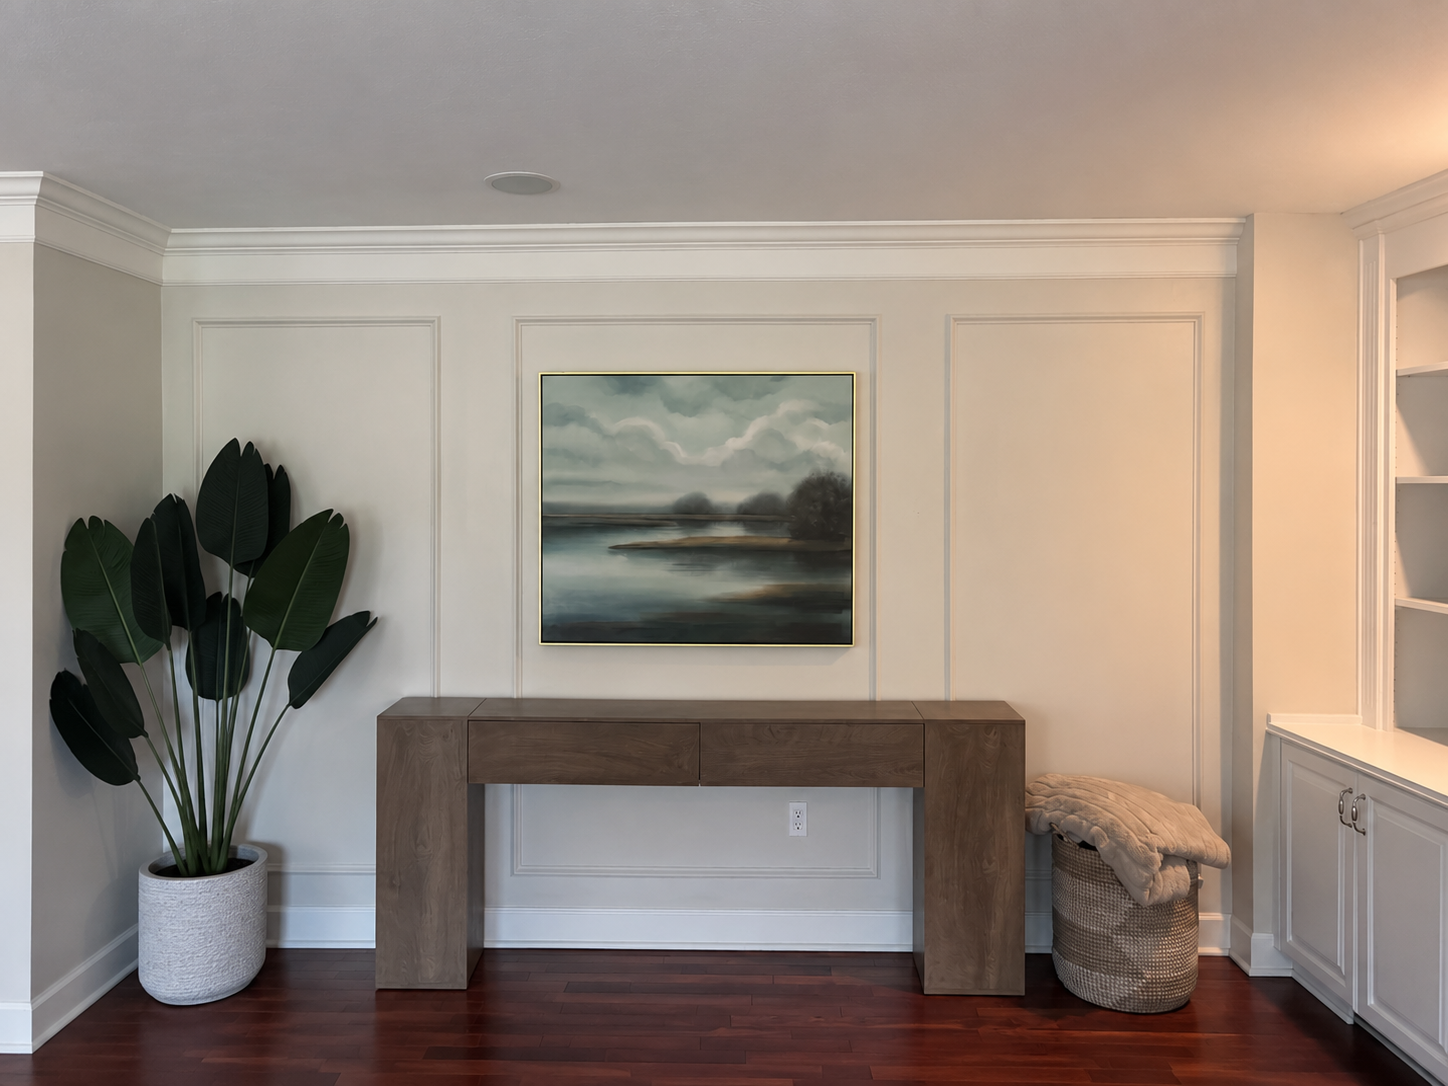
Beautiful Artwork, An Investment Piece
Every well-designed space needs a focal point.
For me, that was the landscape artwork hanging above the console.
While many of the pieces throughout this project were budget-friendly finds, I intentionally chose to invest in artwork because it's one of the first things your eye notices when entering the room. Large-scale art instantly establishes the mood of a space while creating the foundation for everything that follows.
Once the artwork was in place, styling the console became much easier because every other decision was made to support that central focal point.
Laurie’s Tip: Choose artwork that's approximately two-thirds the width of your console table for balanced proportions.
Step 2: Frame the Wall with Lighting
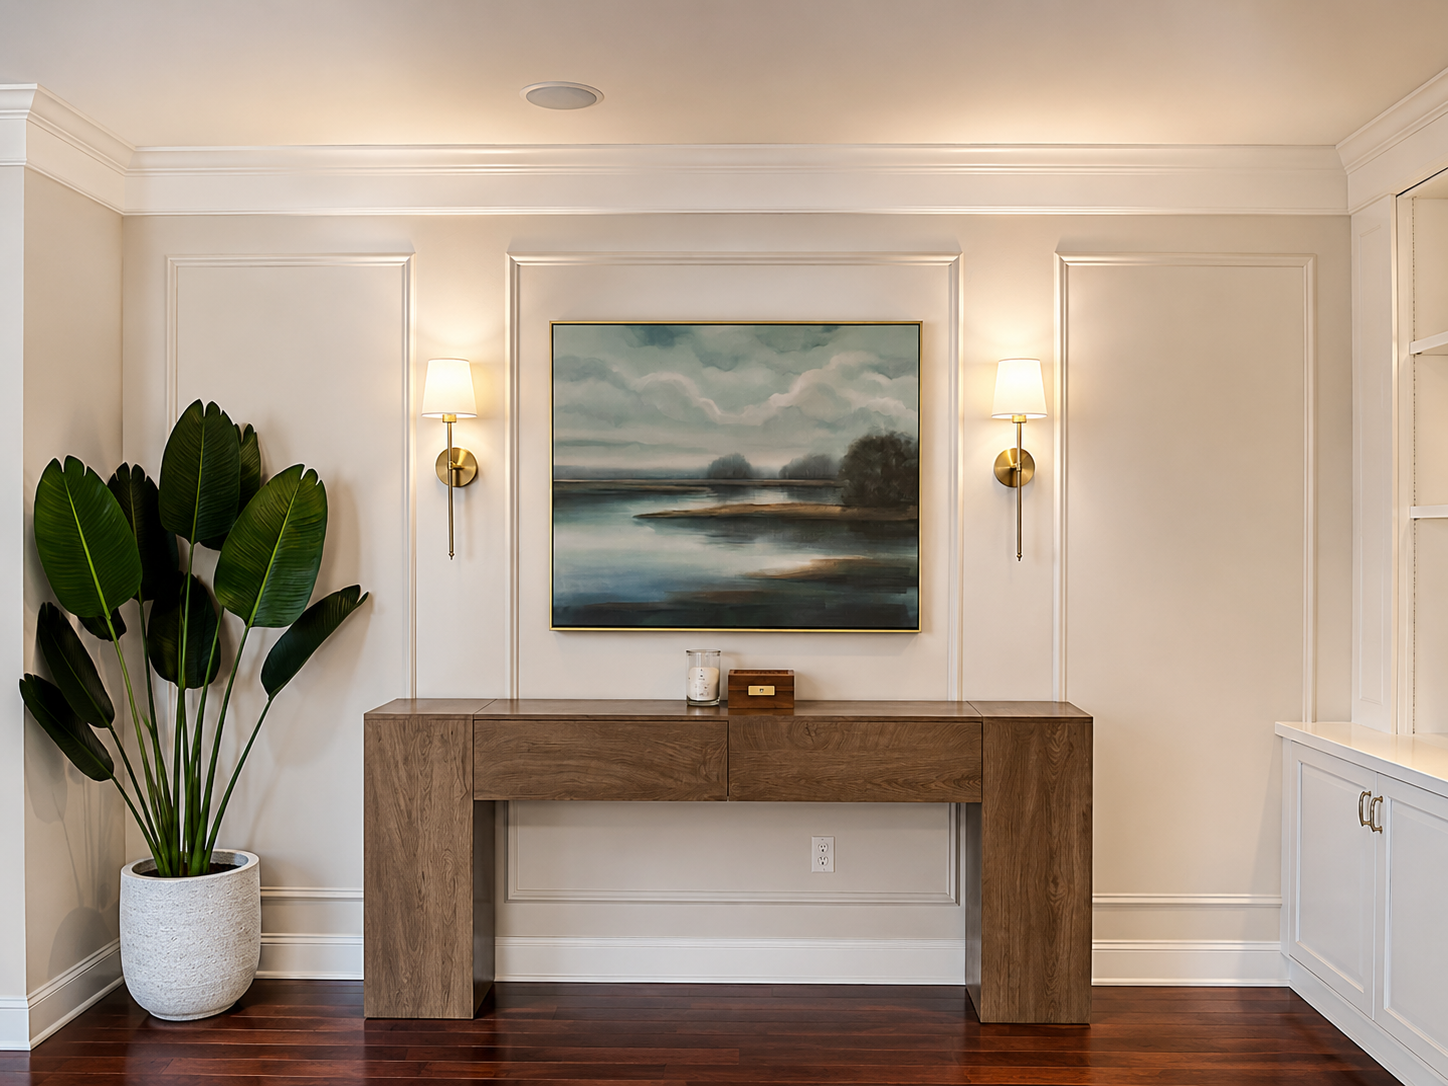
Wall Sconce Lighting
The brass sconces completely transformed this wall.
Originally, the artwork stood alone, but adding sconces on either side created symmetry and gave the wall a much more custom, architectural feel.
Beyond their function, sconces help frame the artwork while drawing your eye upward, making the room feel taller and more polished.
One of my favorite parts of the finished room is turning these lights on in the evening. The soft glow completely changes the atmosphere and makes the entire space feel cozy.
Laurie’s Tip: Symmetry creates a timeless look that never feels trendy.
Step 3: Add Height with a Table Lamp
Lighting is one of my favorite ways to make a room feel warm and welcoming.
After trying several options, I landed on a walnut lamp because it added both height and texture without competing with the artwork or the sconces.
The rounded base softens the clean lines of the console while the linen shade introduces another natural texture into the room.
During this project, I actually tried a different lamp first, but it quickly became obvious that it wasn't the right fit. Sometimes decorating is a process of elimination, and finding the right piece often means trying something that doesn't work first.
This lamp instantly made the entire wall feel more balanced.
Laurie’s Tip: Mix rounded shapes with straight furniture to keep a room from feeling too rigid.
Step 4: Layer Meaningful Accessories
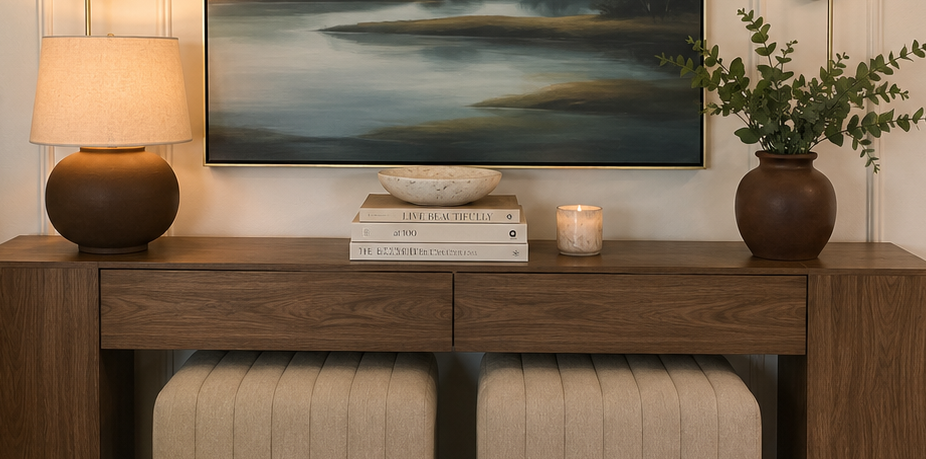
Console Accessories
Instead of placing accessories directly on the console, I created small layers.
A stack of design books became the foundation for a decorative bowl, adding height and making both pieces feel more intentional.
Next to the books, I added a candle to introduce warmth, light, and texture.
If I had to style an entire console with only one decorating accessory, I'd choose books every time.
They instantly create height, allow you to layer smaller objects, and quietly communicate your personality.
Laurie’s Tip: Think in groups rather than individual objects. Layering always feels more natural than scattering décor across a surface.
Step 5: Bring Life to the Space
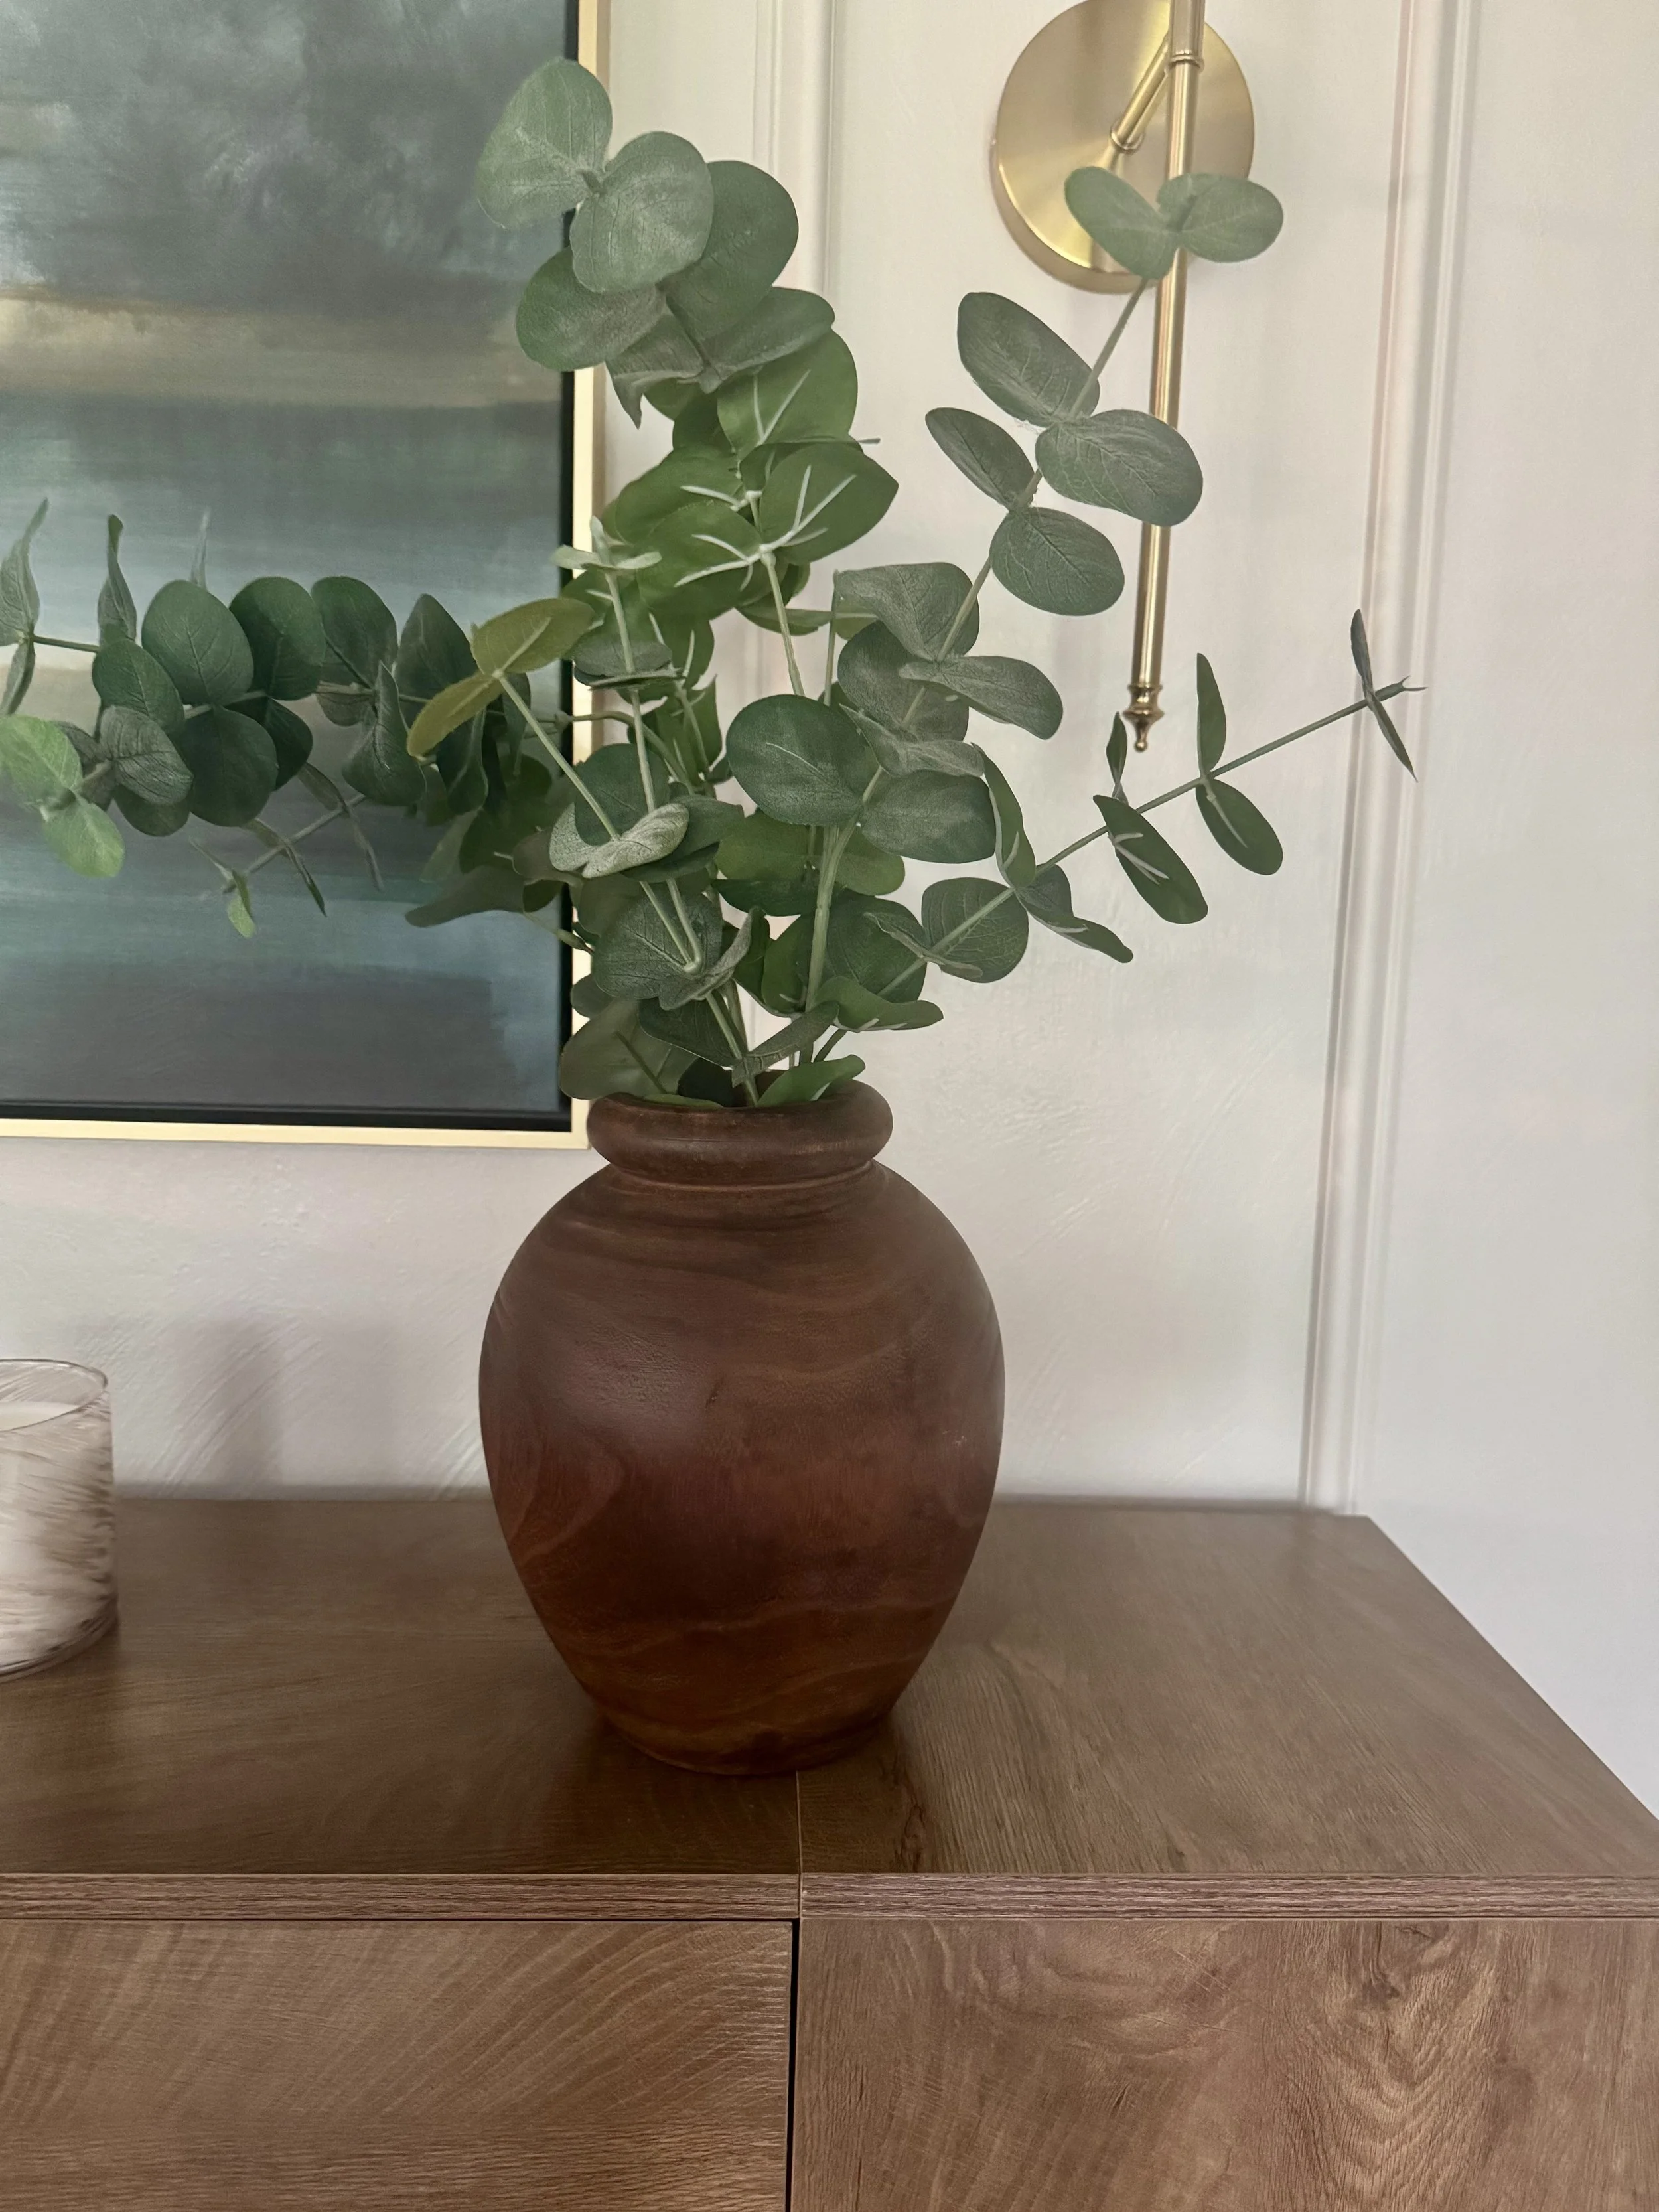
Walnut Vase and Eucalyptus
Every time I style a room, I know I've gone too far if nothing feels alive.
That's almost always my cue to add greenery.
For this console, I chose a dark walnut vase filled with eucalyptus stems.
The greenery softens the structured lines of the artwork, molding, and console while introducing movement and color.
Natural elements are often what keep a room from feeling too perfect or overdone.
Even high-quality faux greenery can make a significant difference.
Laurie’s Tip: Every space benefits from something living or something that looks like it is.
My Five-Step Styling Formula
Whenever I style a console table, I follow the same basic process.
1. Anchor
Choose one large focal point.
2. Height
Add a lamp or tall object to create visual interest.
3. Symmetry
Use lighting or balanced accessories to frame the space.
4. Layers
Stack books, bowls, candles, or decorative objects to create depth.
5. Organic Texture
Finish with greenery or natural materials to soften the overall design.
This formula works whether your style is traditional, modern, transitional, or somewhere in between.
3 Console Styling Mistakes to Avoid
Even beautiful accessories can feel cluttered if they're not arranged intentionally.
Here are the three mistakes I see most often and the simple changes that make the biggest difference.
1. Everything Is the Same Height
When every accessory is roughly the same size, the arrangement feels flat.
Instead, create visual movement by mixing taller pieces like lamps or greenery with medium-height objects and lower accents such as bowls or candles.
Laurie's Tip: I always step back from the room and ask myself if my eye naturally moves from one object to the next. If it doesn't, I usually need more height variation.
2. Using Too Many Small Accessories
It's tempting to fill every empty space, but that's often what makes a console feel cluttered.
A few thoughtfully chosen pieces with breathing room almost always look more refined than a collection of small décor items.
Laurie's Tip: If I have to remove something, it's usually the smallest accessory not because it's unattractive, but because the larger pieces deserve room to stand out.
3. Forgetting to Add Something Organic
Without greenery, flowers, or another natural element, a console can feel static.
Adding one organic piece softens the harder lines of furniture and creates a more welcoming, lived-in feel.
Laurie's Tip: High-quality faux stems work beautifully if fresh greenery isn't practical. I swap mine seasonally to keep the space feeling fresh.
The Final Reveal
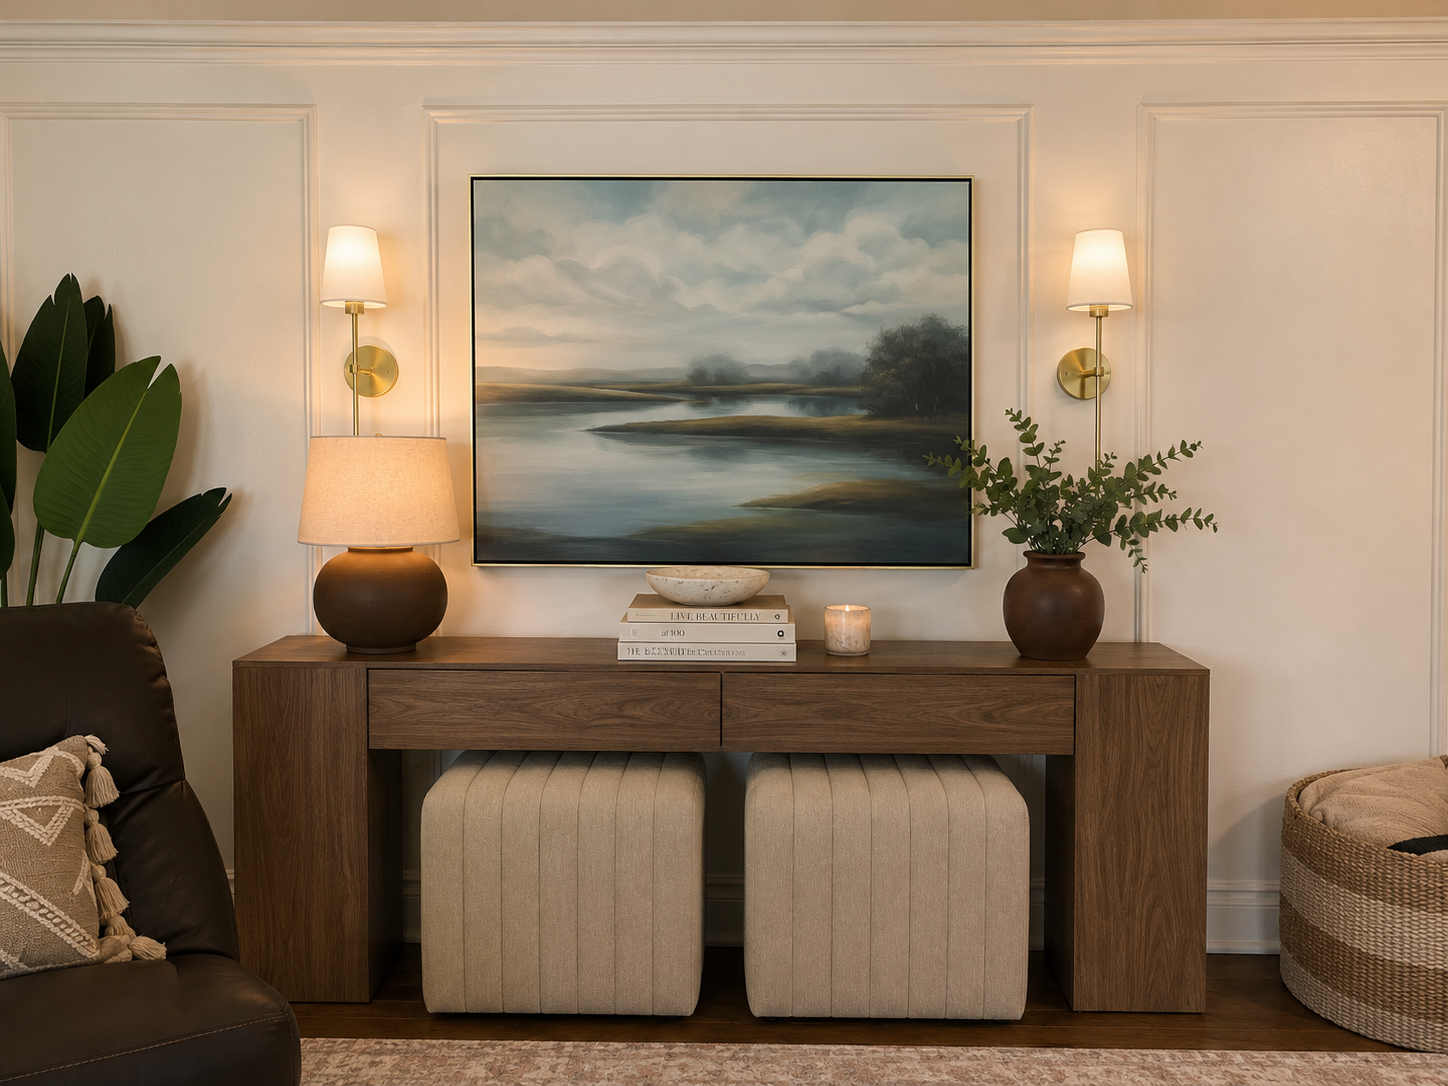
Final Console Styling
Here's the final result. By focusing on balance, height, texture, and a few meaningful accessories, this once-empty console became one of my favorite spaces in our home. The goal was never perfection it was creating a layered, timeless look that feels collected over time.
Disclosure: This post contains affiliate links. If you purchase through these links, I may earn a small commission at no additional cost to you. I only recommend products I genuinely love and use in my own home. Thank you for supporting Layered Living with Laurie.
Shop the Look
If you'd like to recreate this console styling, here are the pieces I used throughout the project.
Landscape Artwork
Walnut Table Lamp (At Home)
Vase (At Home)
Vase (Amazon)
Design Books:
Final Thoughts
Decorating doesn't happen in one shopping trip.
It happens one decision at a time.
A lamp you finally love.
Books you've collected over the years.
A bowl that reminds you of a trip.
A branch of eucalyptus that softens the entire room.
That's how homes become layered.
And that's what makes them timeless.
They're built one thoughtful layer at a time.
Continue the Journey
Want to see how all of these elements came together?
Visit my complete Living Room Wall Makeover to see the full transformation from builder-grade to timeless.
How I Transformed My Living Room Wall into a Timeless Designer Look → See the complete makeover from blank wall to finished space.